 Many people desire a better butt, but do not know how to go about getting one.
The key to a perky behind is working your gluteus muscles, also know as your butt muscles.
The stronger these muscles are, the rounder your bottom will look.
Squats are the exercise best known for bestowing a beautiful booty.
Below, find information about basic squats, as well as a number of variations, both bodyweight and weighted.
If squats aren’t exciting to you, a number of other exercises follow after the section about squats to give you an idea of some non-squat exercises that lead to a better butt.
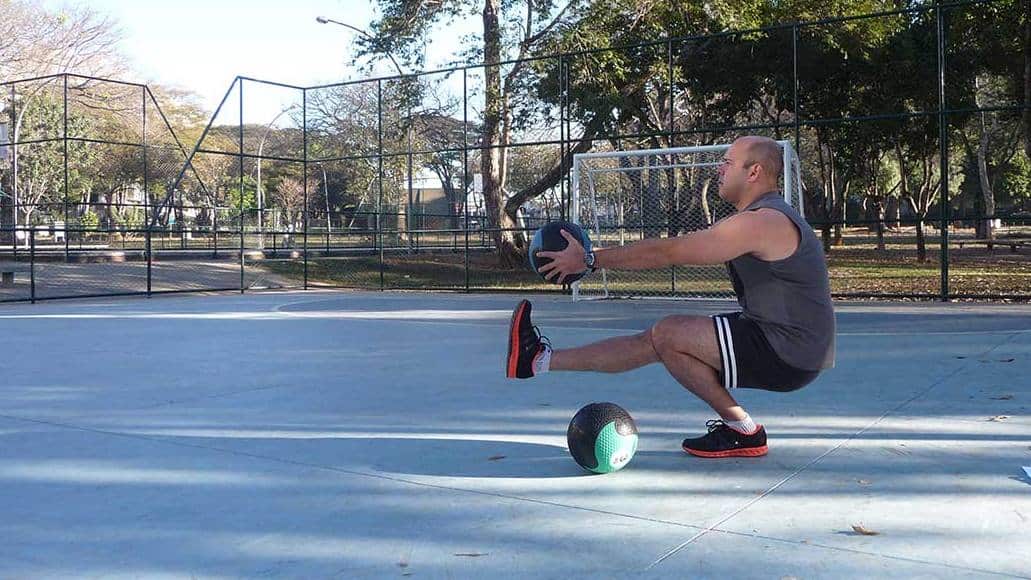
Squats For A Perfect Butt
Squats are the go-to exercise for most trainers when people express a desire to have a better, perkier booty.
- To do a basic squat, stand up straight with your feet hip-width apart and pointing forward.
- Your hands can be in whatever position is most comfortable for you – extended out straight in front of you, on your hips, or clasped in front of your chest.
- Squat down by bending your hips backwards (as if you were going to sit down in a chair), keeping your back straight, and not letting your knees extend over your toes, although they can move forward slightly.
- Keeping your weight in your heels, lower your body until your thighs are slightly lower than parallel to the ground, then engage your glutes as you raise yourself back up.
- Repeat the exercise for 60 seconds.
There are many squat variations that can be done to make squats harder to engage more muscles, including both bodyweight variations and weighted squats.
Bodyweight Squat Variations
Bodyweight squat variations use different beginning poses or add a harder element to a squat, to ensure that it is working more muscles and to change up the exercise.
Sumo Squat/Plie
The sumo squat, also known as a plie, has a different starting position than a normal squat, with the same body-lowering movement.
- Start with your feet a little wider than shoulder width apart and your toes facing outwards, away from your body.
- To get the full range of this exercise, extend your arms straight out in front of you, at chest height.
- Keeping your back straight, lower yourself down as far as possible, without letting your knees go past your toes.
- When you reach as far as you can go, lift yourself back up.
- Repeat for 60 seconds.
Variation: Sumo Squat with Calf Raise
At the bottom of the above-mentioned exercise, raise both heels off the ground in a slow and controlled manner. Return them to the ground before raising yourself back up. Like the above exercise, repeat for 60 seconds.
Squat To Sumo Squat
- Start in the regular squat position, but at the bottom of the squat, raise your hips only a little, then turn your toes and knees out at about a 45 degree angle, and lower yourself again.
- Without lifting yourself fully up, bring your toes and knees back forward and squat again.
- Continue this exercising, without raising yourself, for 45 to 60 seconds.
Squat With Kick-Back
- Do a regular squat, keeping your fists close to your chest.
- At the bottom of the squat, lift one leg out behind you while extending your arms forward into a Superman position.
- Bring your arms and leg back down, returning to squat position, before repeating with the other leg.
- Repeat, alternating legs, for one minute.
Single-Leg Squat With Towel
- Stand with your feet together, one leg on top of a towel or other piece of fabric that will slide across a floor easily.
- Shift your weight to the leg that isn’t standing on the towel.
- Squat with one leg, keeping in mind that your butt and hips should be moving backwards and the knee of the leg that is holding your weight should not go in front of the toes.
- As you squat, slide the towel sideways, away from your body, keeping that leg straight.
- Return to the start position.
- Repeat on one side for 30 to 45 seconds, before transitioning to the other side.
Heel-Lifted Squat
- Stand with your feet hip-width apart, as if you were going to do a normal squat.
- Lift one heel off the ground, then, without lowering it, and keeping the weight in the other heel, perform a normal squat.
- Do not push the toes of your heel-lifted leg into the ground.
- Keep your arms extended in front of you for better balance.
- Repeat for 45 seconds to a minute, then switch to the other leg.
Variation: Pistol Squat
To make this harder and to work on your balance, lift your entire leg off the ground and keep it straight in front of you, as close to parallel to the ground as you can make it.
Perform a squat using just a single leg. Repeat for 30 to 45 seconds before switching legs.
Weighted Squat Variations
Weighted squat variations add more intensity to your workout, allowing you to build more muscle and gain the ability to move more weight around.
Weighted squats are great in that they not only help your to build up your lower body, including your glutes, but they also work your upper body and your core, including your stabilizer muscles.
Dumbbell Squats
- Hold an 8 to 10 pound dumbbell in each hand, with your hands by your sides and your feet shoulder-width apart.
- Perform a normal squat as described above.
- Do 8 to 12 reps per set.
Barbell Squats
- Lift the barbell over your head and place it on your back, on the lower part of your shoulders.
- Make sure that the barbell is balanced correctly.
- Holding the barbell in place, perform a normal squat.
- Do 5 to 8 reps per set.
If you are a weightlifting beginner, use just the barbell until you are comfortable, then add more weight as you see fit.
If you have a good power rack, that makes this exercise much easier and more efficient.
Kettlebell Squats
Holding a kettlebell in front of your chest with both hands, perform a normal squat as described above.
This is also sometimes called a “Goblet Squat.” Do 8 to 12 reps per set.
Other Butt-Building Exercises
While many people praise squats for their ability to build a better booty, some people find squats boring, or have trouble holding the correct position.
If you are one of those people, read on.
Standing Exercises
These exercises don’t require you to be on the floor, so they are great for people without access to a yoga mat or other area suitable for floor work.
Lunges
In order to work your glutes, you will want to step into a long lunge rather than a short lunge.
- To do a lunge, start by standing straight up with your hands on your hips.
- Using one leg, step forward as far you can, until your stepping leg is at a 90 degree or smaller angle and the knee of your back leg nearly touches the floor.
- Once you are in the position, step back.
- Repeat on the same side for 30 seconds, then switch legs for another 30 seconds.
To add more intensity, do lunges with dumbbells, kettlebells or while wearing a weighted vest like these.
Variation: Explosive Lunges
Rather than work one side at a time, explosive lunges work both sides.
- To do the exercise, start with your right foot, lunging forward as described above.
- Once you are in the lunge position, jump up and switch legs, landing with your left foot in the forward lunge position and your right foot behind you.
- You can keep your hands on your hips, or as fists in front of your face, for the duration of the exercise.
- Repeat for one minute, switching legs with each jump.
Variation: Curtsy Lunges
This is more of a reverse lunge, as you are stepping backwards rather than forwards, but there is also a wider range of movement than with a normal lunge.
- To do this exercise, start by standing straight up with your feet shoulder-width apart.
- Take your left leg, cross it behind you, and lower yourself as you step back.
- Your right knee should stay above your right ankle, and your left knee should come close to touching the floor.
- Try to press your right heel into the floor, then lift your left leg for a side kick.
- Repeat for 30 seconds, then switch sides.
Single-Leg Front Raises
This exercise requires dumbbells, but you can use any household item, such as two water bottles, if you don’t have dumbbells.
- Start with your feet hip-width apart, holding one dumbbell in each hand, then lift your right foot a few inches off of the ground behind you.
- Keeping your knee bent and your foot off the ground, raise your hands in front of you, at chest level.
- Slowly raise your right hand, keep it straight up in the air for a short pause, then bring it back down.
- Repeat with your left hand, alternating sides.
- After you have done 8 total arm lifts (4 on each side), put your right foot down, and repeat the entire exercise with your left foot a few inches off of the ground.
Single Leg Dead Lift
- Start with your feet hip-width apart, with one foot a few inches in front of the other.
- Use your abs to lift your front foot off of the ground, folding yourself in a little as you move your upper body toward the ground.
- Touch the tips of your fingers to the ground while lifting your leg behind you, keeping the knee at a 90 degree angle.
- Then return to the starting position, without replacing your foot on the ground.
- Repeat this exercise for 30 seconds to a minute, then switch sides.
Floor Exercises
For the following exercises, the use of a yoga mat will help keep you from hurting your back, especially if you have a bony tail bone or spine, or trouble with your knees.
Glute Bridges/Hip Lifts
- To do this exercise, lie on your back on your yoga mat, with your knees bent and your feet on the floor, your hands at your sides.
- Lift your hips to the ceiling, keeping your shoulders on the ground.
- Pause, then lower your hips back to the ground.
- Repeat for 45 seconds to a minute.
Variation: Single Leg Glute Bridges
To focus the exercise on your glutes in a bigger way, start in the same position as above, but after raising your hips, extend one leg so that your thighs are parallel but your extended leg is straight.
Keeping your leg straight the entire time, lift your hips to the ceiling, pause, then lower your hips and leg together.
Repeat for 30 to 45 seconds, then work the other leg as well.
Toe Taps
- Start this exercise by lying on the floor, hands at your sides.
- Keeping your abs engaged, lift your thighs up perpendicular to the ground, bending your knees at a 90 degree angle so that your lower legs are parallel to the yoga mat.
- Keeping one leg up and your thighs as close to possible as perpendicular to your core, bring the other leg down, bending your knee and letting your toes touch the floor.
- Lift your leg again, then bring down the leg that stayed in the air in the same fashion.
- Repeat, switching legs with every toe tap, for 60 seconds.
Sun Salutation
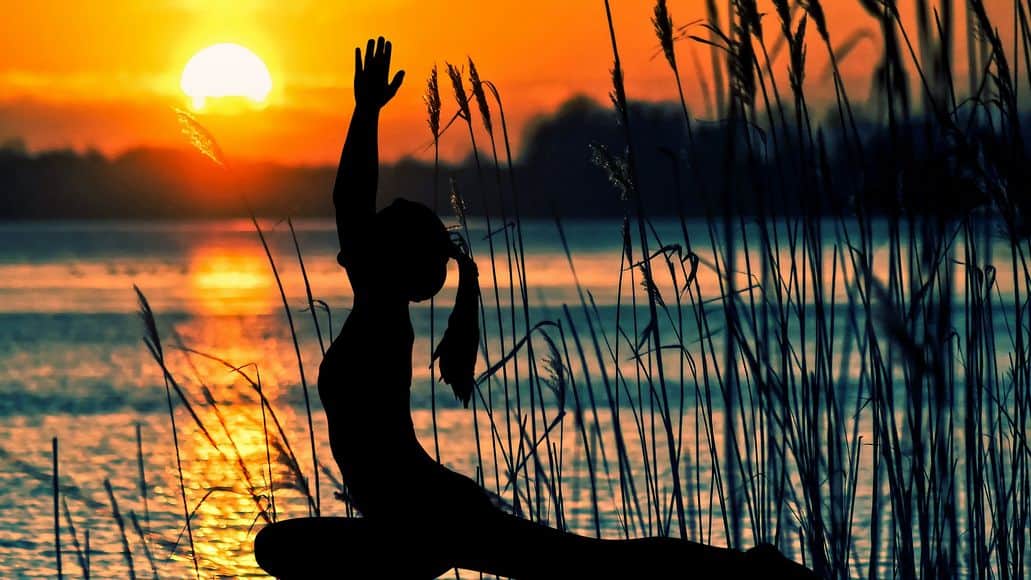
This yoga sequence, while not a singular movement, is a great glute and flexibility exercise, especially steps 4 through 9.
Start by standing straight up, shoulders back, feet together, hands at your sides.
Then, there are 12 steps to a sun salutation:
- Bring your hands up in front of your chest into a “prayer” position.
- Push your hands above your head and behind you, arching your back as you stretch back as far as you can.
- Fold forward, trying to touch your forehead to your knees and your fingers to the ground.
- Bend your knees, placing both hands on the ground, then take a step back as far as you can with your right foot, lowering yourself into the stretch and raising your head toward the ceiling.
- Bring your left foot to your right, letting your hips raise, trying to make your body into an upside-down “V.” This is also known as the “Downward Dog.”
- Lower your body to the ground until your feet, knees, chest, and forehead are touching it.
- Raise your head and bend your back as far as possible. This is also known as the “Cobra Pose.”
- From Cobra, push your hips up, positioning yourself back into Downward Dog.
- Step forward with your right leg, so that your left leg is behind you, mirroring the position you were in earlier (in step 4) when your right leg was behind you. Raise your head toward the ceiling and lower yourself into the stretch.
- Step forward with your left leg, bringing your butt and hips toward the ceiling and straightening your legs while trying to keep your fingertips on the ground.
- Slowly stand up and bend backwards, reaching as far back as possible.
- Bring your hands back together in the prayer position in front of your chest, standing straight.
Clam Dig With Rotation
- Start on the floor, lying on one side of your body, with your head cradled in the palm of the arm that is on the floor.
- Bend your knees in front of you at a 45 degree angle, then lift your top leg and free arm (with a dumbbell or water bottle to make it harder) at the same time, ensuring that you keep your core engaged throughout the exercise and that your hips stay stacked and your body doesn’t wobble.
- Try to get your forearm and top leg both perpendicular to the ground, then pause, before returning to them both to the ground.
- Repeat for 60 seconds before switching sides.
Hydrants With Leg Extension
- Start on the floor with hands and knees touching the ground. Hands, wrists, and shoulders should all be in a line, and knees should be directly below your hips.
- Lift one leg sideways toward the ceiling, until your thigh is parallel with the ground, then kick out.
- Bring your lower leg back in, then lower your knee back to the ground.
- Repeat on one side for 45 to 60 seconds, then switch to the other side.
Rainbows
- Start in the same beginning pose as the hydrants.
- Keeping your toe pointed, bring one leg straight out behind you, and slightly out to the side, making sure to keep it level with your back.
- Keeping your abs and back engaged, slowly lower your leg to the floor, tap it with your toes, then, keeping your glutes engaged, bring your leg back to the starting position.
- Continue the motion until your straight leg is over the foot that is still on the ground, then tap the ground, and bring your leg back to the starting position.
- Trying to keep the motion as fluid as possible, repeat for 45 seconds to a minute, before switching to do the exercise on the other side of your body.
Bear Plank Leg Lifts
- Start in the plank position, with your body in a straight line from head to heel, hands and toes on the floor, wrists below your shoulders.
- Bend your knees slightly, bringing one leg into a full 90 degree angle before lifting it straight up, keeping your foot flexed rather than toes pointed and trying to get your heel as close to the ceiling as possible.
- Pause, then bring your leg back to the starting position with knees parallel.
- Repeat on one side at a time for 45 to 60 seconds.
Butt Exercises: Tips
Here are some things to remember when doing the above exercises.
- Unless the exercise calls for you to twist your body, try to keep your hips and shoulders square. This will be difficult at first, but will become easier with practice, and your body will thank you for your mindfulness.
- Breathe through the exercises. Never hold your breath for more than one repetition. If the movement is explosive, exhale as you “explode.” If the movement is slow and deliberate, inhale when you want your body at its widest, and exhale when moving into a new position.
- Don’t push yourself into a position that is painful. Discomfort is okay, as you are working your muscles, but pain means something is wrong. For example, if you can’t yet do a full squat, do a half squat until your body understands the movement. Pushing your limits is okay as long as you understand the difference between discomfort and actual pain.
Leave a Reply